


How To Build Arched Door with Glass?
Views: 0 Author: Site Editor Publish Time: 2026-08-18 Origin: Site


Custom curved millwork defines a building's architectural character, but marrying radius woodworking with custom glazing introduces severe technical complexity. Fabricators face high failure rates in custom exterior door projects. Wood movement destroys tight tolerances. Seal failures plague curved glass panels. Non-standard frames suffer structural sagging under immense weight. Building a reliable arched door requires strict engineering protocols. You must control dimensional lumber stability and manage water infiltration along a continuous curve. We need a rigorous framework to evaluate construction methods and material specifications. You must decide whether to fabricate in-house, modify existing materials, or commission a specialized millwork shop. This guide breaks down the structural requirements, templating procedures, and glazing techniques necessary to execute radius millwork successfully on the job site.
Material Stability is Critical: Fabricating a solid wood arched front door requires engineered stave-core construction or bent lamination to prevent warping and joint failure.
Glass Integration Dictates Design: Custom curved Insulated Glass Units (IGUs) require exact templating and dictate the routing depth and glazing stop design of the door frame.
Framing Precedes Fabrication: The rough opening and the arched jamb must be constructed and perfectly plumbed—often utilizing CAD modeling or plywood corner templates—before the door is templated to ensure accurate clearances.
Interior vs. Exterior Scope: While interior arched pocket doors or retrofitted archways can utilize simplified plywood framing and single-pane glass, exterior applications demand rigorous weatherproofing and structural engineering.
Build vs. Buy Threshold: The tooling costs, specialized joinery, and liability of weatherproofing often push exterior arched doors into the "commission" category for all but advanced millwork shops.
Defining Success Criteria for Custom Arched Doors
Structural Integrity and Joinery Requirements
Radius doors carry immense weight. A standard three-foot by eight-foot solid hardwood slab with a one-inch insulated glass unit easily exceeds 200 pounds. This mass places extreme shear force on the top hinge and the stile-to-rail joints. Deep mortise and tenon joints remain the industry standard for connecting the arched top rail to the vertical stiles. The tenons must penetrate at least three to four inches into the stiles to provide adequate glue surface and mechanical locking.
Heavy-duty floating tenon joinery provides an acceptable alternative when utilizing specialized structural epoxy. Standard dowel joinery fails under the sheer stress of a heavy swinging slab. The arched top rail presents a major structural vulnerability. Cutting an arch from a single wide board exposes short grain at the curve's apex. Short grain lacks tensile strength and snaps easily under pressure. Grain direction must follow the arch profile to maintain structural integrity. Fabricators overcome this by utilizing bent lamination or assembling the arch from multiple angled segments joined with splines.
Joinery Method | Shear Strength | Fabrication Complexity | Best Application |
|---|---|---|---|
Deep Mortise & Tenon | Maximum | High (Requires specialized slot mortiser) | Heavy exterior doors with large glass panels. |
Floating Tenon (Domino XL) | High | Medium | Interior doors, medium-weight exterior doors. |
Splined Miter/Segmented | Moderate | High | Paint-grade arches, secondary structural rails. |
Standard Dowels | Low | Low | Not recommended for heavy radius doors. |
Weatherproofing and Thermal Performance
Water infiltration destroys exterior millwork. Sealing a rectangular door is straightforward. Sealing a continuous radius requires advanced weatherstripping techniques. Exterior-grade silicone bulb weatherstripping must compress evenly along the entire arched jamb. Inconsistent reveals lead to air leaks and water damage. You must route a continuous kerf into the jamb stop to accept the weatherstripping barb, ensuring it does not stretch or bunch around the tightest parts of the curve.
Water management requires sloped sills and integrated drip edges. Rainwater hitting the glass must shed downward without pooling at the bottom rail. Proper glazing sealants prevent moisture intrusion behind the glass. Capillary action pulls water into tight spaces. You must utilize structural silicone and drill weep holes at the bottom of the glazing pocket to allow trapped moisture to escape.
Interior vs. Exterior Application Constraints
Exterior doors face extreme temperature differentials. The interior face experiences climate-controlled heating, while the exterior face endures freezing rain or direct solar heat gain. This differential causes aggressive wood bowing. You must engineer the door slab to resist these forces through proper material selection and multi-point locking hardware.
Interior arched pocket doors face lighter requirements. Climate-controlled environments forgive minor wood movement. Single-pane glass reduces the overall weight. Interior archways utilize simplified plywood framing and standard hinges. High-exposure exterior entryways destroy weak joinery and demand specialized multi-point locking systems to prevent the slab from warping out of the frame.
Material Evaluation: Selecting the Right Foundation
Solid Wood Arched Front Door Construction
Wood selection dictates the lifespan of the project. Solid lumber moves unpredictably. Stave-core construction outperforms solid lumber in almost every metric. Stave-core involves gluing small blocks of stable wood together to form a core, then wrapping it in thick hardwood veneers. This engineered approach neutralizes internal wood tension and prevents the stiles from twisting.
A solid wood arched front door requires exterior durability. You must select species known for rot resistance and dimensional stability. White Oak offers incredible strength and a closed cellular structure that resists water. Honduran Mahogany provides exceptional stability and machines beautifully. Modified woods like Accoya undergo chemical acetylation to prevent moisture absorption entirely.
Wood Species | Dimensional Stability | Rot Resistance | Machining Properties |
|---|---|---|---|
White Oak (Quartersawn) | High | Excellent | Hard on tooling, requires sharp carbide. |
Honduran Mahogany | Very High | Excellent | Machines cleanly, excellent glue adhesion. |
Accoya (Modified Pine) | Extreme | Extreme | Requires stainless steel fasteners to prevent reaction. |
Sapele | Moderate | Good | Prone to tear-out due to interlocking grain. |
Glass Specifications for Curved Profiles
Glass integration dictates the entire frame design. Single-pane tempered glass suits interior or historic applications where thermal performance is irrelevant. Single-pane glass requires a shallow glazing rabbet and lightweight stops. You can easily secure a 1/4-inch tempered pane with minimal structural impact on the door stiles.
Custom curved Insulated Glass Units (IGUs) are mandatory for modern exterior thermal compliance. An IGU consists of two or more glass panes separated by an argon-filled spacer. Bending glass requires specialized kilns. Radius glass manufacturing involves long lead times and exact templating. The door frame must accommodate the thickness of the IGU, often requiring a glazing pocket up to one inch deep. This deep pocket reduces the structural meat of the wooden stiles and rails, requiring you to increase the overall thickness of the door slab to 2.25 inches to maintain strength.
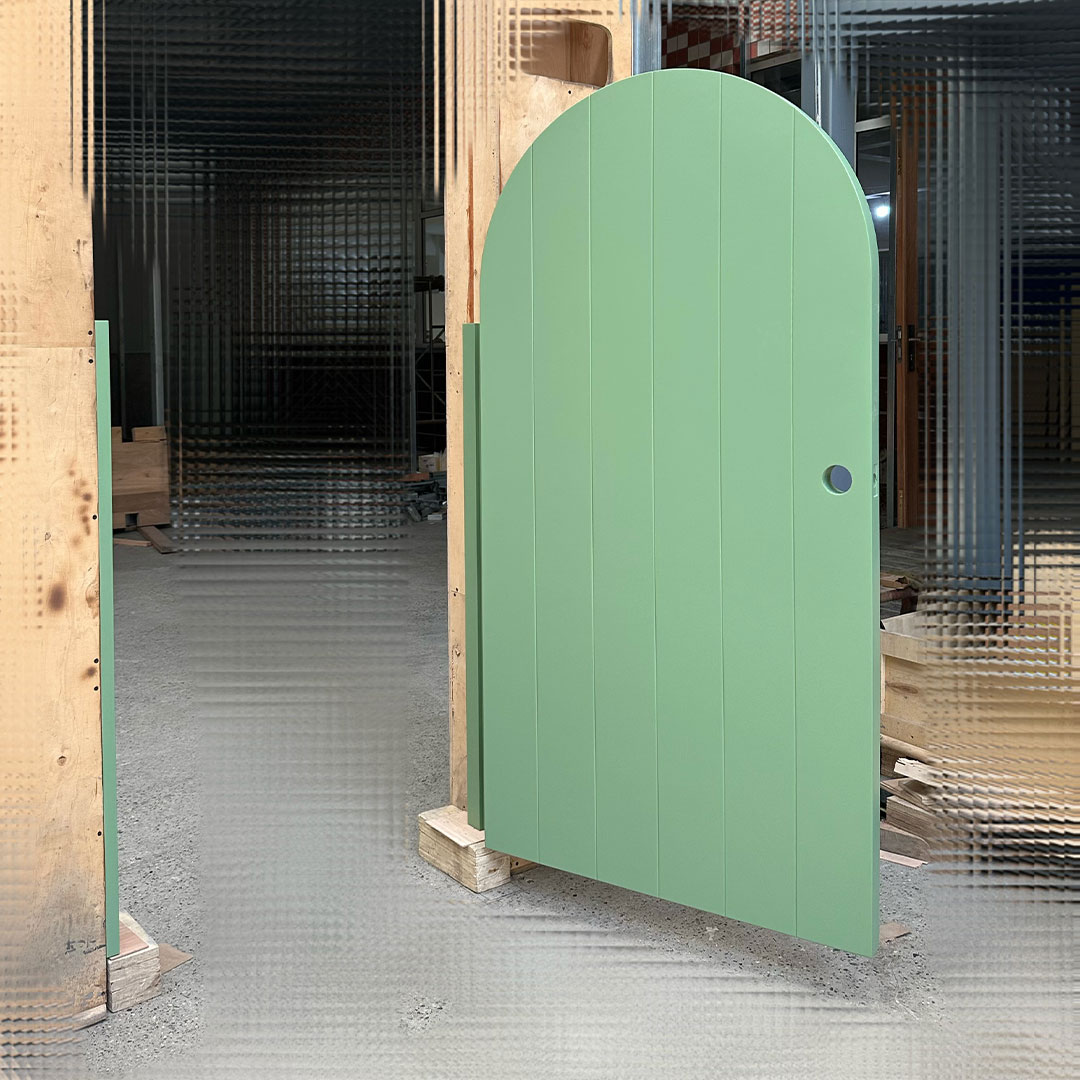
Technical Construction Framework: Building the Curved Top Front Door
Architectural Modeling and Templating the Rough Opening
Physical construction begins in the digital realm. Use architectural software to model the arch radius. Digital models dictate frame thickness, glass clearances, and hardware placement. You must establish the exact springline—the point where the vertical sides transition into the curve. A curved top front door relies entirely on the accuracy of this initial geometry.
Create a rigid MDF or plywood template based on the digital file. This template serves as the master reference for the rough opening, the door jamb, the door slab, and the custom glass manufacturer. Never order curved glass based on mathematical measurements alone. Send a physical plywood template to the glass fabricator to ensure a perfect fit.
Draft the full-scale profile on a half-inch sheet of MDF.
Mount a plunge router to a custom trammel arm set to the exact radius of the arch.
Route the profile in multiple shallow passes to prevent bit deflection.
Sand the template edges perfectly smooth to prevent transferring bumps to the final workpiece.
Mark the springline, center point, and reveal offsets clearly on the template face.
Framing New Arches vs. Retrofitting Square Openings
Framing a new arched doorway opening requires specialized techniques. Kerfed plywood framing bends easily to match the radius. You cut evenly spaced slots into the back of a plywood strip, allowing it to curve without snapping. CNC-cut structural ribs provide superior backing. You install these ribs between the standard wall studs to create a solid nailing surface for the curved jamb.
Retrofitting an existing rectangular opening avoids altering the structural header. You create custom-cut arched plywood corner pieces, known as gussets or inserts. Fasten these inserts into the upper corners of the square rough opening. This creates a seamless curve on the interior face while maintaining the original structural framing. The door jamb then fastens directly to these plywood inserts, allowing you to install a radius unit into a standard framed wall.
Fabricating the Arched Rails (Scratch-Build vs. Modification)
Fabricators choose between three primary methods for creating the arched top rail. Bandsawing the arch out of wide, solid stock creates high waste. This method exposes weak short grain at the top of the arch. It is fast but structurally inferior for heavy exterior doors.
Bent lamination offers superior strength. You rip the wood into thin, pliable strips. Apply specialized urea-formaldehyde glue to each strip to prevent springback. Clamp the bundle around a rigid MDF mold using heavy-duty bar clamps or a vacuum press. The resulting laminated arch is incredibly strong because the wood grain follows the continuous curve.
Resaw kiln-dried lumber into strips no thicker than 1/8 inch.
Plane each strip to a uniform thickness to ensure tight glue lines.
Apply a rigid-curing adhesive like Unibond 800 evenly across all mating surfaces.
Place the bundle into a vacuum bag over the MDF form and pull a full vacuum.
Allow the assembly to cure for 24 hours before removing it from the press.
Joint one face flat, then plane the laminated blank to final thickness.
Modifying an off-the-shelf solid core door offers a hybrid approach. You cut a custom arch into the top of a standard rectangular door and insert a pre-fabricated glass frame. This method severely limits structural integrity. Cutting into a manufactured door compromises its internal engineered core and voids all warranties. Always match the door's top rail radius to the jamb radius closely. Maintain strict reveal tolerances of 1/8 inch to 3/16 inch to ensure proper weatherstripping compression.
Routing and Glazing for Glass Panels
Securing heavy glass requires precise routing. Route a continuous rabbet along the arched profile using a heavy-duty shaper or a handheld router with a template guide. The rabbet depth must accommodate the glass thickness, the glazing tape, and the wooden stops. Use a spiral upcut bit to clear chips efficiently and prevent tear-out on the curved grain.
Never allow glass to touch bare wood. Wood expands and contracts. Glass does not. Direct contact causes the glass to shatter. Install flexible glazing tape along the rabbet. Place neoprene setting blocks at the bottom of the glazing pocket to support the weight of the IGU. Apply a continuous bead of structural silicone sealant. Fasten custom-milled curved wood stops using 18-gauge brad nails to secure the glass safely. Angle the nail gun carefully to avoid striking the edge of the insulated glass unit.
Scaling the Project: Complex Configurations and Double Doors
Hardware, Hinging, and Pocket Door Systems
Heavy, glass-filled exterior doors require heavy-duty ball-bearing hinges. Standard residential hinges will sag under the weight of a solid oak slab with insulated glass. Use minimum 4.5-inch commercial-grade hinges with a thickness of 0.134 inches. Ensure the hinge screws penetrate entirely through the jamb and into the structural wall framing. For doors exceeding 250 pounds, pivot hinges offer superior load distribution by transferring the weight directly to the floor.
Interior arched pocket doors need specialized track hardware. The door slab itself remains rectangular at the top hidden edge to interface with the standard linear pocket door track. Only the visible doorway opening features the arch. Multi-point locking systems face spatial limitations on curved frames. The upper locking bolts must engage before the curve begins, requiring careful hardware selection and precise mortising.
Sidelites, Transoms, and Arched Double Entry Door Systems
Two arched doors meeting in the center create severe weatherproofing challenges. An arched double entry door requires a custom T-astragal. The astragal attaches to the inactive door panel and provides a weather-sealed stop for the active panel. You must integrate flush bolts into the top and bottom of the inactive panel to lock it securely in place. The top flush bolt requires a custom strike plate mortised directly into the arched head jamb.
Integrating fixed glass sidelites alongside the main arched frame requires complex mullion joinery. The vertical mullions must support the weight of the overhead arch while resisting wind loads. Fixed glass elements must utilize the same glazing tape and silicone sealant protocols as the swinging door to maintain consistent thermal performance across the entire entryway. You must engineer the mullions with internal steel reinforcement if the overall opening width exceeds standard wind load parameters.
Build vs. Buy: Trade-offs and Implementation Risks
Tooling and Shop Requirements
Safe and accurate fabrication requires industrial machinery. Heavy-duty spindle shapers with power feeders produce clean, chatter-free profiles on curved parts. Custom radius knives must be ground to match your specific glass stops and panel profiles. Vacuum presses handle bent lamination efficiently, applying even pressure across complex curves. Attempting to build a curved exterior door with basic hobbyist tools often results in dangerous kickback, ruined materials, and inaccurate joinery.
Warranty, Compliance, and Building Codes
DIY fabrication carries significant risks. Local building codes mandate specific energy efficiency ratings and wind load resistance for exterior doors. Uncertified custom doors lack NFRC labels. Failing to meet these codes complicates home inspections and insurance claims. Inspectors look for certified Design Pressure ratings on exterior fenestration.
Homeowner insurance liability increases with uncertified exterior doors. Water damage resulting from a failed DIY door seal is rarely covered. Commissioning a specialized architectural millwork manufacturer transfers this liability. Professional shops provide warranties on wood movement, glass seal failure, and finish degradation. The volume of raw materials, custom radius glass, and specialized tooling for a one-off build frequently exceeds the practical limits of a standard job site setup.
Conclusion
Measure your rough opening to determine if structural reframing or plywood corner inserts are required for the new radius.
Draft a 1:1 scale MDF template of the exact arch radius to serve as the master guide for framing, door fabrication, and glass ordering.
Contact a local custom glass fabricator immediately to confirm lead times and maximum thickness constraints for curved Insulated Glass Units.
Source exterior-grade stave-core lumber or prepare your shop for bent lamination using urea-formaldehyde adhesives.
Select and order your multi-point locking hardware and heavy-duty ball-bearing hinges before routing the door stiles.
FAQ
Q: How do you cut glass for an arched door?
A: Single-pane glass can be cut with a standard glass cutter by tracing a rigid template. Exterior-grade tempered or insulated glass cannot be cut after manufacturing. It must be custom-manufactured to a rigid physical template by a specialized glass facility using high-temperature kilns.
Q: What is the best wood for an exterior solid wood arched front door?
A: Select dimensionally stable and rot-resistant species like Honduran Mahogany, White Oak, or modified woods like Accoya. Straight grain is essential to prevent twisting. Avoid softwoods or unrated hardwoods, as they will warp under exterior temperature and moisture fluctuations.
Q: How do you seal glass in a wooden arched door?
A: Use high-performance flexible glazing tape along the rabbet. Place neoprene setting blocks at the bottom to prevent glass-to-wood contact. Apply a continuous bead of structural silicone sealant beneath the custom-milled curved wood stops to ensure a watertight, flexible seal.
Q: Can you install a curved top front door in a standard rectangular opening?
A: Yes, but the rough opening must be modified. You can reframe the header to support the arch, retrofit the corners using structural arched plywood inserts, or build a custom square-to-arch transom frame that fits the existing rectangular opening while housing the arched door inside.
Q: Is it possible to make an arched pocket door?
A: Yes. It requires a custom-built arched jamb on the visible side of the doorway. The door slab itself remains rectangular at the top hidden edge. This allows the hidden rectangular top to interface smoothly with standard linear pocket door track hardware.
Q: What type of hinges are required for heavy glass-filled doors?
A: Heavy exterior doors require commercial-grade ball-bearing hinges, typically 4.5 inches or 5 inches in height with a minimum thickness of 0.134 inches. For slabs exceeding 250 pounds, pivot hinges are recommended to transfer the extreme weight directly into the floor framing.


